Mastering camera-ready makeup is essential for capturing flawless photos․ Learn how to enhance your features, ensure long-lasting wear, and create a polished look that shines in any lighting․ This guide provides step-by-step techniques to help you achieve professional results for photoshoots or special occasions․ Discover how to choose the right products, blend seamlessly, and highlight your natural beauty for stunning, picture-perfect makeup․
1․1 Understanding the Importance of Photography-Ready Makeup
Photography-ready makeup is crucial for creating a flawless, polished look in photos․ Unlike everyday makeup, it needs to withstand bright lights and camera flashes while enhancing your features․ Proper techniques ensure your makeup appears natural and radiant, even under intense scrutiny․ Understanding the differences in product selection and application is key to achieving a camera-perfect look that lasts and looks stunning in every shot․
1․2 Key Differences Between Everyday Makeup and Photoshoot Makeup
Everyday makeup focuses on natural enhancement, while photoshoot makeup requires durability and camera-friendly finishes․ Photoshoot makeup often involves heavier coverage, precise application, and products designed to withstand lighting․ Techniques like contouring and highlighting are more defined, and setting products are essential to prevent oiliness and ensure longevity․ The goal is to create a flawless, polished look that translates perfectly on camera, unlike the subtle finish of daily makeup․

Preparing Your Skin for Makeup
Prepping your skin is crucial for a flawless makeup look․ Start with cleansing, moisturizing, and hydrating to create a smooth, even base for your makeup application;
2․1 Moisturizing and Hydrating Your Skin
Moisturizing and hydrating your skin is the first step to achieving a flawless makeup look․ Use a lightweight, hydrating moisturizer suitable for your skin type to create a smooth canvas․ Apply it gently, ensuring even coverage․ Proper hydration helps your makeup stay in place longer and prevents dry patches, ensuring your skin looks radiant in photos․ This step is vital for a fresh, camera-ready complexion․
2․2 Applying Primer for a Smooth Base
Applying primer creates a smooth, even base for your makeup, ensuring it lasts longer and looks flawless in photos․ Use a radiance or luminizing primer to enhance your skin’s natural glow․ Gently apply a small amount, blending evenly across your face․ This step helps your foundation adhere better and minimizes pores, giving you a polished, camera-ready finish․ A well-prepped base is key to achieving professional-looking results․
Foundation and Concealer Application
Foundation evens your skin tone, while concealer targets imperfections․ Choose products that match your skin for a natural look․ Apply foundation smoothly, then spot-conceal blemishes for a seamless finish․
3․1 Choosing the Right Foundation Shade
Test foundation shades on your jawline to find a perfect match․ Consider your skin’s undertones—cool, warm, or neutral․ Apply a small amount to blend seamlessly for a natural look․ Avoid shades too light or dark, as they can appear unnatural in photos․ A well-matched foundation ensures a flawless base, creating a smooth canvas for the rest of your makeup and enhancing your features in pictures․
3․2 Concealing Blemishes and Dark Spots
Apply concealer after foundation for optimal coverage․ Use a shade one tone lighter to brighten dark spots․ Gently blend with a brush or beauty blender for a seamless finish․ Set with translucent powder to prevent cakeiness and ensure longevity․ Choose a lightweight, matte concealer to create a smooth, camera-ready look that lasts all day in photos․
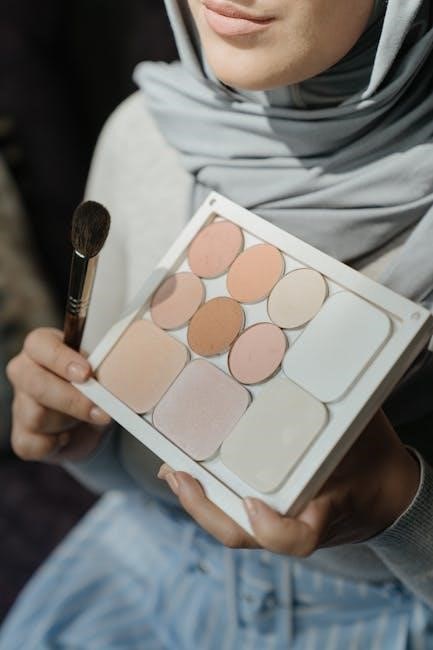
Contouring and Highlighting Techniques
Define your features with bronzer for depth and highlighter for radiance․ Blend seamlessly to enhance your natural structure and achieve a polished, camera-ready look in photos․
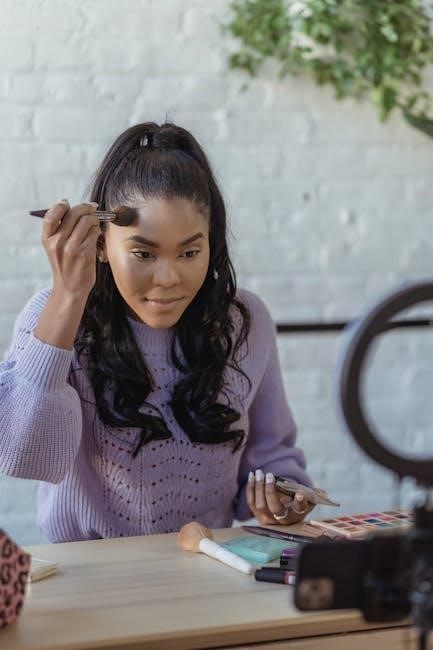
4․1 Defining Your Features with Bronzer
Bronzer adds depth and dimension to your face in photos․ Choose a shade close to your skin tone for a natural look․ Use a contour brush to apply it to the hollows of your cheeks, temples, and jawline․ Gently blend to create a seamless transition․ This technique enhances your natural structure, making your features stand out beautifully in pictures while maintaining a polished, photogenic appearance․
4․2 Adding Radiance with Highlighter
Highlighter enhances your glow in photos by illuminating key areas․ Choose a subtle shade matching your skin tone․ Apply it to the high points of your face—cheekbones, cupid’s bow, brow bone, and inner eye corners․ Blend gently for a natural, radiant finish․ This step brightens your features and creates a luminous complexion, ensuring your skin looks fresh and vibrant in every snapshot․
Eye Makeup for Photos
Elevate your look with eyeshadow, eyeliner, and mascara․ Define your eyes for a polished appearance in photos, ensuring your makeup stands out while looking natural and radiant․
5․1 Step-by-Step Eyeshadow Application
Start by applying a light base color across your lid for a smooth canvas․ Use a medium shade in the crease to add depth, blending upward for a seamless transition․ Highlight the brow bone with a shimmery shade for brightness․ Line the lash line with a darker shade and blend slightly․ Finish by smudging a soft brown along the lower lash line for a natural, defined look that enhances your eyes in photos․
5․2 Mastering Eyeliner and Mascara
Start with a soft, short stroke along your upper lash line for a natural look․ For precision, use a liquid or gel eyeliner to create a subtle wing; Tightlining adds depth without being bold․ Coat your lashes with mascara, focusing on the base for volume and the tips for length․ Apply a light layer to the lower lashes for a balanced, polished finish that enhances your eyes in photos․
Grooming Your Eyebrows
Groomed brows frame your face and enhance your features in photos․ Use a brow pencil or powder to fill sparse areas, following your natural shape․ Define the arch for a polished look and set with Brow Gel for long-lasting results that capture perfectly in pictures․
6․1 Shaping and Filling Your Brows
Start by brushing your brows to identify their natural shape․ Use a brow pencil or powder to fill in sparse areas, following the direction of hair growth․ Define the arch for added depth and symmetry․ Avoid overfilling to maintain a natural look․ Set with brow gel for a polished finish that lasts and looks great in photos․ This step ensures your brows are perfectly framed for camera-ready results․ Brow products like pencils and gels help achieve a flawless, defined shape that complements your overall makeup look seamlessly․
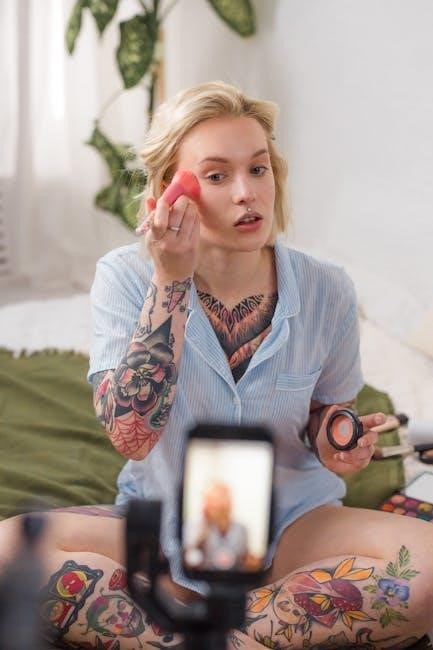
Adding Color to Your Cheeks
Blush adds a natural, healthy glow to your complexion․ Choose a shade that complements your skin tone and apply it to the apples of your cheeks for a soft, radiant look that enhances your features in photos․ Blend gently for a seamless finish․ This step boosts your overall makeup look with a touch of color and vibrancy, ensuring you look fresh and camera-ready․ Blush is a simple way to bring life to your face while maintaining a polished, professional appearance in any setting or lighting condition․
7․1 Blush Application for a Natural Glow
For a natural glow, choose a blush shade that complements your skin tone․ Gently apply it to the apples of your cheeks using soft, upward strokes․ Blend thoroughly to avoid harsh lines, ensuring a seamless look․ Start with a light layer and build color gradually for a fresh, radiant appearance․ This technique enhances your features and adds vibrancy, making your skin look healthy and luminous in photos without appearing heavy or overdone․

Lip Makeup for Photos
Define your lips with precision for stunning photos․ Choose shades that complement your skin tone and apply lipstick or gloss carefully for a polished, camera-ready finish․
8․1 Choosing the Perfect Lipstick Shade
Selecting the right lipstick shade enhances your photo-ready look․ Opt for colors that complement your skin tone—cool tones for fair skin, warm neutrals for medium, and deep berry shades for darker skin․ Consider your personal style and the occasion․ For natural photos, try soft pinks or corals․ Bold colors like red or plum can make a statement in images․ Ensure the shade matches your undertones for a harmonious finish․ Swatch on moisturized lips for accuracy․
8․2 Applying Lip Gloss for a Polished Look
Apply lip gloss for a shiny, hydrated finish that enhances your photos․ Start with a primed or lined lip for definition․ Use the doe-foot applicator to dot gloss in the center, then sweep outward․ Ensure even coverage without excess․ Opt for sheer or lightly tinted shades to avoid overwhelming the look․ Blot gently with a tissue for a polished effect․ Choose formulas with light reflection for a radiant appearance in photos․
Setting Your Makeup
Setting your makeup ensures longevity and prevents oiliness in photos․ Use powder or setting spray for a flawless finish that lasts all day․
9․1 Using Powder to Set Your Base
Setting your base with powder is crucial for a long-lasting finish․ Use translucent or tinted powder, blending gently with a brush or puff․ This step mattifies the skin, reduces shine, and ensures foundation stays in place․ Proper application prevents oiliness, ensuring your makeup looks flawless in photos and lasts throughout the day․ It’s an essential step for camera-ready results․
9․2 Finishing Touches for Long-Lasting Makeup
Seal your look with a setting spray to ensure longevity and prevent smudging․ Use blotting papers to control shine without disturbing your makeup․ For extra polish, apply a light layer of translucent powder to T-zone areas․ Finally, refresh your lips with a touch of gloss or balm for a camera-ready finish․ These final steps ensure your makeup stays flawless and photogenic all day long․
Final Tips for Camera-Ready Makeup
Perfect your look with a setting spray for long-lasting wear․ Avoid oily areas and ensure even coverage․ Opt for products that complement your skin tone and lighting․ Highlight your natural beauty for a radiant, camera-ready appearance․ Confidence shines brighter than any makeup!
10․1 Avoiding Common Makeup Mistakes in Photos
Avoid heavy foundation that appears cakey under bright lights․ Over-contouring can create harsh lines, while excessive shimmer may look overly reflective․ Ensure your makeup blends seamlessly and matches your skin tone․ Avoid ashy products and steer clear of dark lip colors that can wash you out․ Test your look in natural light and adjust as needed for a flawless, camera-ready appearance․
10․2 Ensuring Your Makeup Looks Flawless in Any Lighting
To ensure your makeup looks flawless in any lighting, test it under natural light and adjust as needed․ Use a hydrating primer for a smooth base and apply foundation that matches your skin tone․ Blend thoroughly and set with powder to prevent oiliness․ Avoid heavy shimmer and opt for matte finishes․ Finish with a setting spray to lock your look in place, ensuring it remains radiant and polished in every setting․